 News
NewsZendesk Survey Integration and Custom fields injection
2017-11-01
Many of customer using Zendesk has turned to Examinare for using our automated Survey loop and getting the Survey response back to Zendesk tickets to be enabled to analyse the data inside Good data or inside Examinare Survey Tool itself.
It is advisable that you replicate the Zendesk configurations you have in a sandbox or create a new Zendesk environment to testdrive the integration before putting it live.
Step 1: Create the Survey inside Examinare Survey Tool.
Start by adding the Survey inside Examinare. There are templates inside the tool that you can choose from but be creative but do not add too many questions in there because it can make the users void answering them.
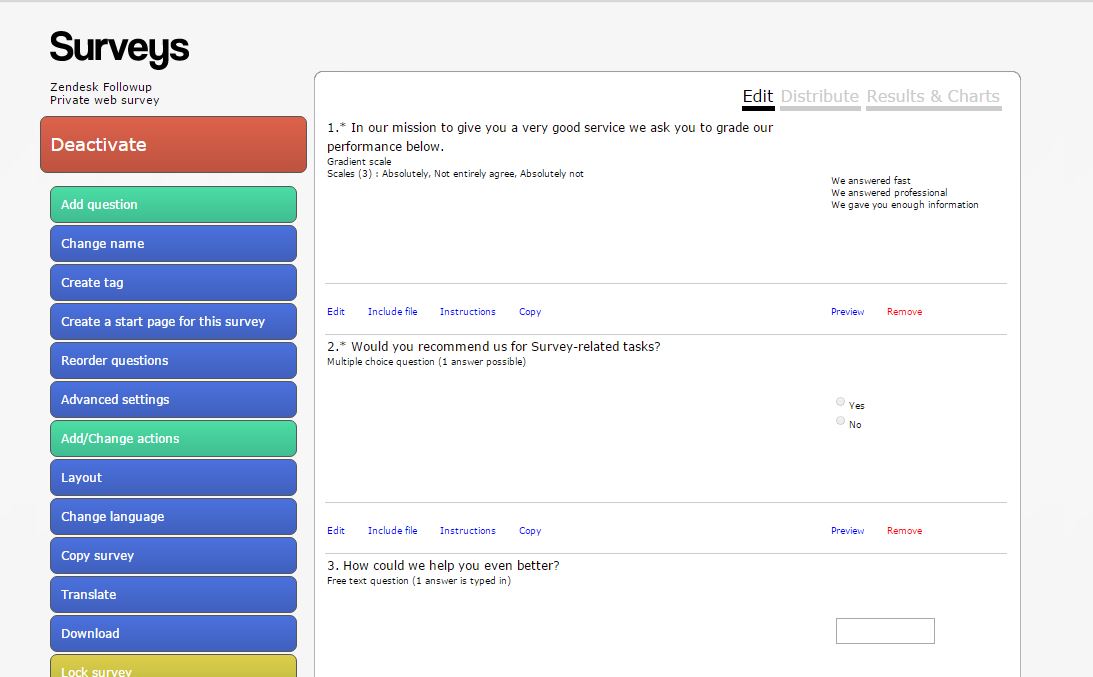
Step 2: Publish the Survey.
Publish the survey as Private web survey and test-drive the survey with your email.

Now it is time to testdrive your survey and make sure that you get correct design. If you prefer to have all the questions on one page then goto the Advanced settings inside the Survey Edit view and activate the Form option.
Step 3: Create test tickets.
Create 5-6 tickets by emailing them to Zendesk and solve them to check that the integration works your way.
These tickets will be found by the Zendesk integration and next step will trigger them into survey invites.
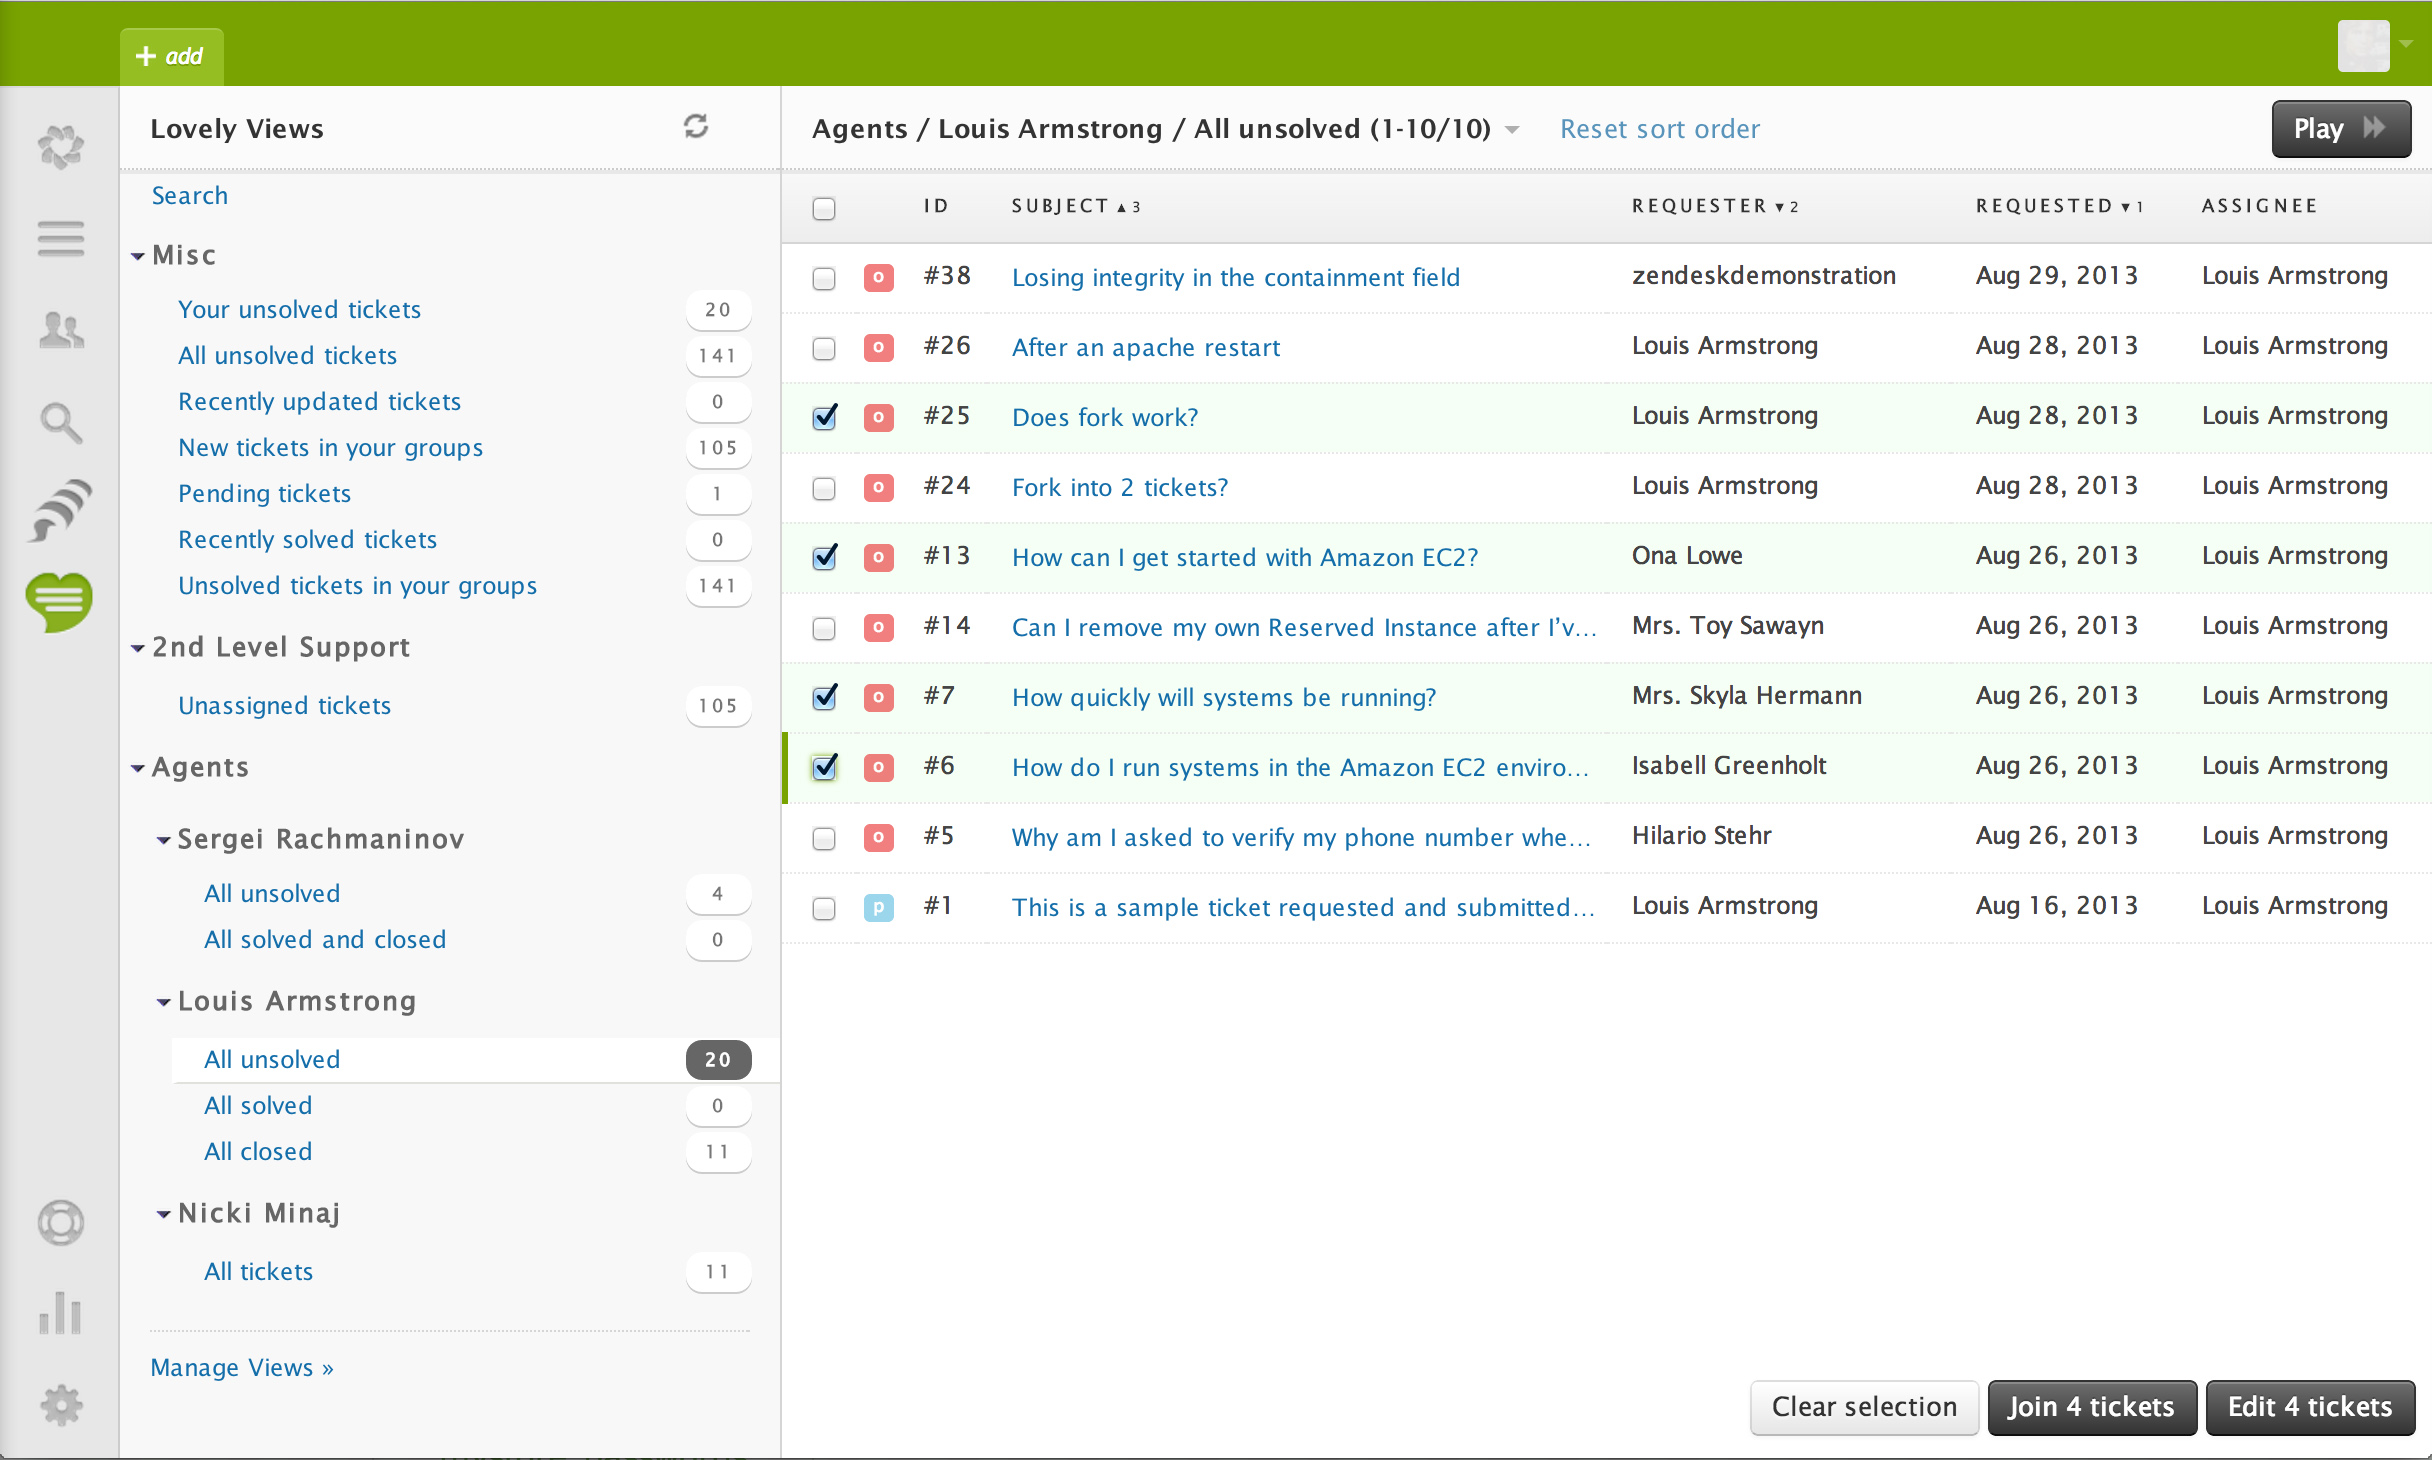
Make sure you send them by email since Zendesk API do not return Emails of the tickets that is created through forms.
Step 4: Activate the Zendesk integration inside Examinare.
Go into the Integrations section inside Examinare and add your API credentials and set the amount of days from the ticket is marked as closed before the survey will be sent.
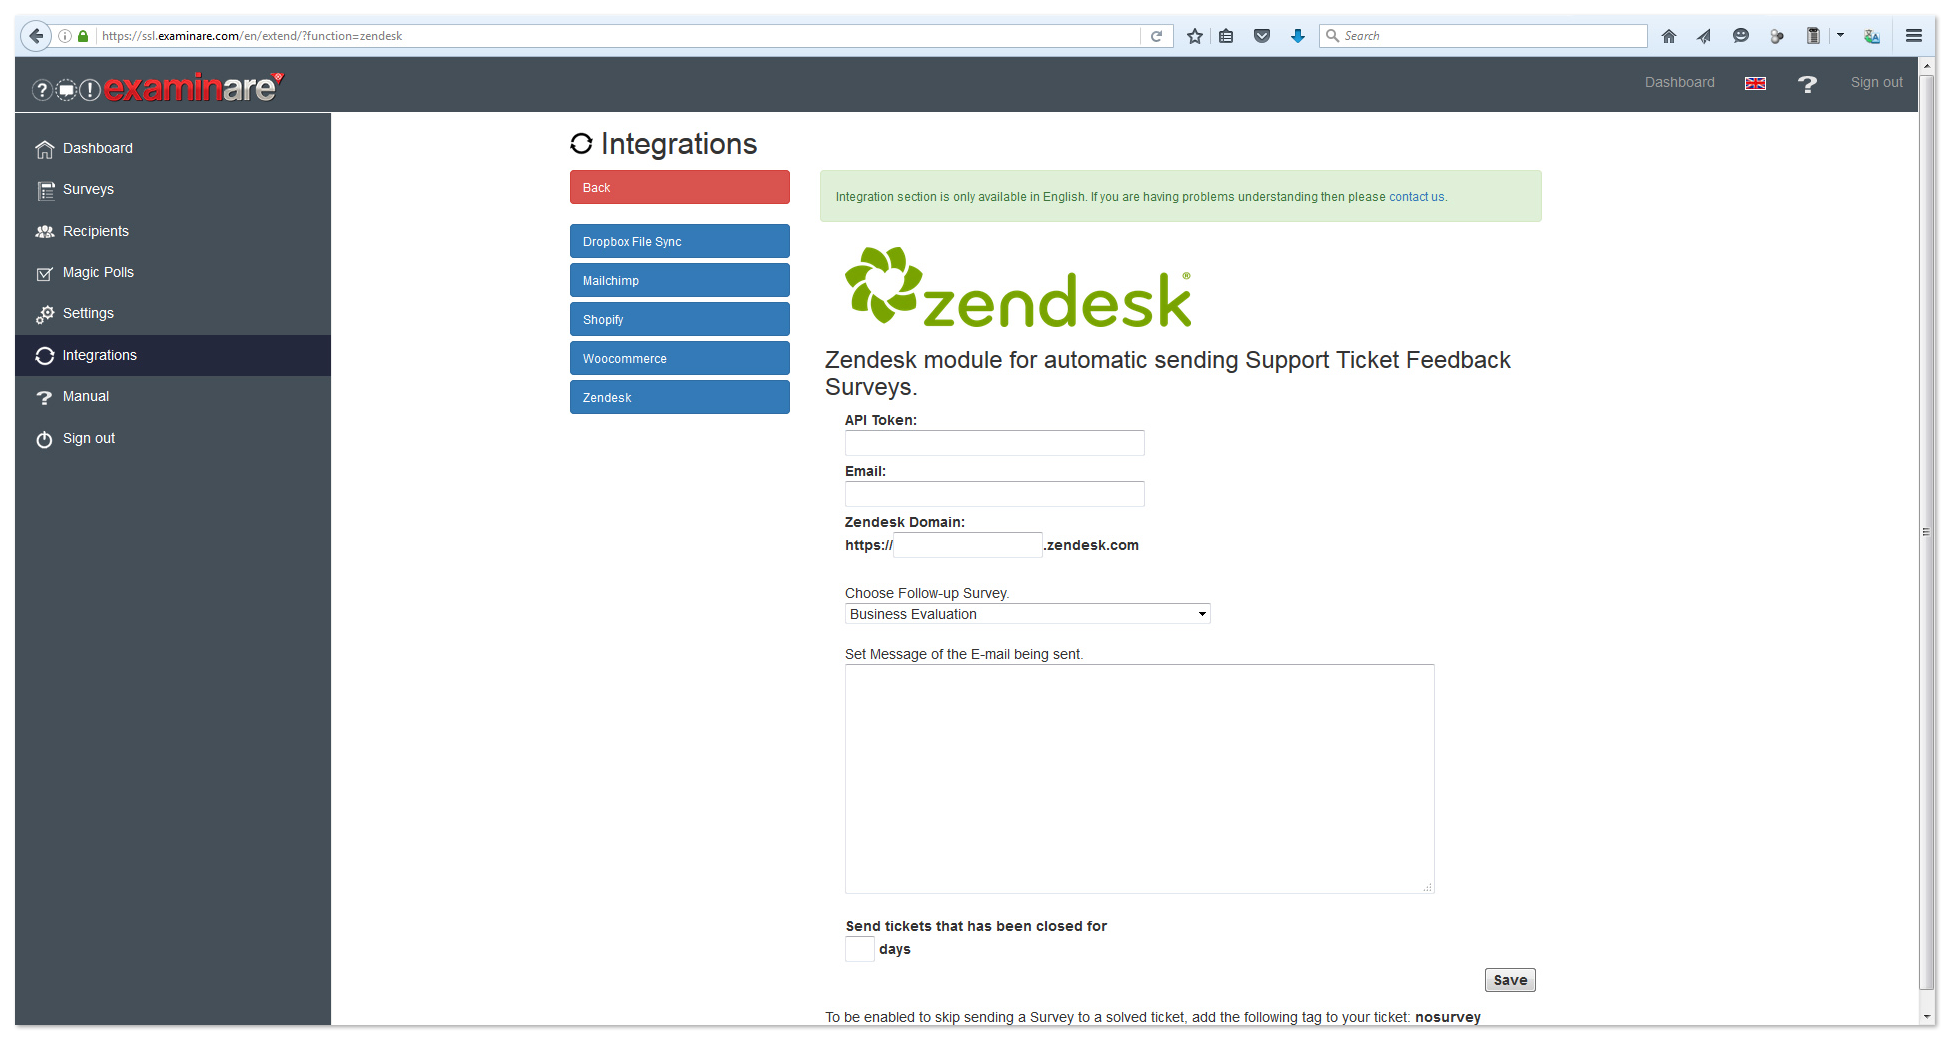
It is recommended to make it 2 or 3 days depending on how long cooling down period you want your customers to have. Right now in this stage we put the days to 0.
If you have access to a sandbox environment then you can use this for test or create a new account for testing in Zendesk. It is not recommended to use the production environment until everything is setup.
Next step is to setup the catch PHP script to catch the survey vote and push it back to Examinare.
If you need help with this then contact Examinare team to get help to integrate it.
Step 5: Upload scripts and setup the redirect url in Examinare.
So now we come to the part where the survey responses is sent back to the Zendesk ticket. So what you need is a hosting of some kind that can handle our surveyback.php file and customize it so that the right information is sent back.
So we will start with these 3 scripts downloadable here as a zip file. The lib folder should be uploaded without any changes. The file that we need to do changes in is the surveyback.php file.
When uploaded take the url to the script and navigate into Settings -> Layout -> “Change link on thank you page” -> English (Change English to the language that you will be using in the survey)
Add the url in the field url field and check the “Redirect to URL”.
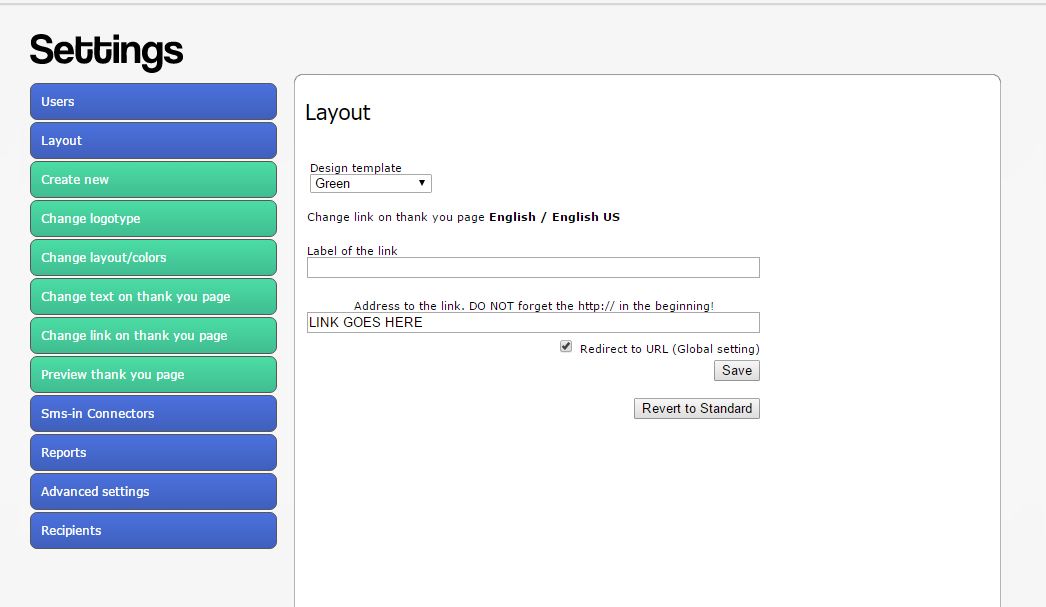
If you want you can then create a new template that is only used by this Survey so that other traffic is not redirected to the scan script.
Step 6: Activate the Examinare API.
Navigate to Settings -> Advanced settings and activate the Examinare API. Note down the details and continue to next step.
Step 7: Update the PHP script.
Change the PHP lines from line 9 until line 27. If need of help the contact support at support@examinare.com and make sure you include a code sample and a survey invite.
Step 8: Answer test invites.
Answer one of the surveys sent to your email from the integration and check so that you are getting the correct information inside the ticket fields of the ticket.
The PHP script will return a lot of data if successful so that you can easily check the errors that eventually is created when the systems are called.
If you need help from the support then take the url from this request and send it to support@examinare.com.
Step 9: Edit code for production use.
Change the information to match the production system and remove line 78 until line 86.
Make sure you leave the line:
header(“Location: “.$key[“thankyoupage”]);
at the bottom of the script.
You are all set to enjoy Zendesk reporting. If any problems then contact Examinare support at support@examinare.com
Contact Examinare
Price Quotation
Find out how Examinare can help you! One of our Examinare experts will contact you shortly to discuss your needs and how you can benefit from Examinare Solutions.
Fill in the form and we will contact you shortly.